
The Items tab shows a list of products published in the request as wells as all the details you provided during the request creation. From here, you can manage the product list, update/edit product information, and communicate with suppliers. The following are the main actions you can take:
1. Search for Specific ProductsQuickly find a product within the list by using the search bar.
Easily download the complete list of items from the request.
In order to add additional items, simply click “Add new item” button. After that, a new field will appear, just like when you create a request at the stage of adding items, allowing you to enter data for a new product in each column. The newly added item will appear at the end of the list in just a few moments.


While doing so, please do not forget to click “Save item” button, otherwise the changes will not be applied.
4. Edit, Delete, or Attach Files to Products- edit product, double click on it, change data and click Enter or any empty space on the page
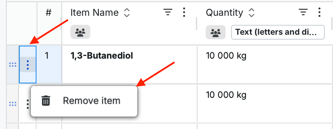
- delete product
- attach files for each product

5. Edit Items via Excel in bulk
You can modify the product list in bulk by using an Excel file.
- Simply download the existing product list.
- Make the necessary changes in the Excel file.
- Once updated, upload the file back into the system.

In case you enable the Q&A feature at the General step of RFQ creation, an appropriate icone, namely Q&A, will appear next to each item.

- Suppliers have the option to use this chat feature to ask questions or write comments on the items.
- Questions will stay private until you reply, with supplier identities kept hidden to maintain confidentiality.
- You can easily filter products to check if their questions have been answered.

To invite suppliers to submit quotes for specific items, click the “Manage for that item” button. There you will find the “Invite further supplier” option – enter the details of the supplier you are willing to add to the request and the invitation link will be sent to their e-mail address.


You also have the option to use an automated supplier listing, which will provide a list of suppliers who have previously submitted quotes for similar products. Including a CAS Number can help refine the supplier search.

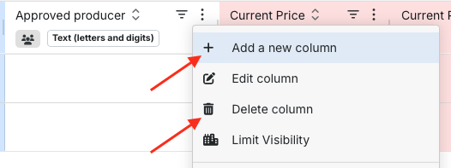
8. Add New Columns
You can easily add or delete columns by clicking Three Dots button in the top right corner next to Column name and choose options Add a new column or Delete column.
After that a modal window will appear, where you should select the column type:
- Private: Visible solely to you.
- Public: Visible to everyone.
- Fillable for suppliers: Suppliers can enter details themselves but it is not mandatory.
- Fillable for supplier (required): Supplier must enter the information as it is mandatory.
- Current / other information: Visible solely to you.

The format for the column has to be set. There are the following types: text, date, formula, or numbers.

Finally, enter the name of your column.

Once the column is added, use ![]() button to add, edit or delete columns, sort, pin, autosize them. You can also group columns, choose certain columns to be shown or hidden, reset columns and manage their visibility;
button to add, edit or delete columns, sort, pin, autosize them. You can also group columns, choose certain columns to be shown or hidden, reset columns and manage their visibility;

9. Control Column Visibility
To manage who can view each column, click the building icon under the column name.

In the modal window that appears after, you can select or deselect specific companies or users to control their access and then save your changes.

Read more about how to work with Items tab here: Article `How to Work with Items tab`
This tab offers you full flexibility in handling your request, whether it's adding or editing items, managing supplier list, or controlling item visibility.